Teacher Feature...
Batik - Lesson & Rubric
for Grades 10-12
by Carolann Tebbetts
| Grade Level: |
Grades 10-12 |
| Time Required: |
8-12/50 min. sessions |
| General Objective: |
To introduce students to the decorative and textile arts. |
| Specific Objective: |
Students will execute a decorative composition based on a chosen theme. |
Massachusetts Arts Framework Learning Standards:
| Standard 1: |
Media, Materials, Techniques
Students will learn how to use batik, a wax-resist method of dyeing fabric. |
| Standard 2: |
Elements and Principles of Design
Students will use the elements of color, line, shape in their compositions. |
| Standard 7: |
Roles of Artists in Communities
Students will learn how textile artists contribute to the economic and cultural life of the Indonesian people. |
Vocabulary:
| Batik: |
A wax-resist method of creating designs on fabric |
| Chop Stiks: |
Copper stamps that transfer wax to fabric in a uniform manner |
| Fiber-reactive dye: |
A water-soluble coloring agent that bonds with natural fibers |
| Fixative: |
A chemical that makes a dye permanent and lightfast. |
| Tjanting: |
(pronounced "chanting") wax tool or pen with a well and fine tip for creating thin lines with melted wax. |
| Wax- resist: |
The use of melted wax to impregnate fibers so the fibers will not absorb dye |
Student Materials:
- Stretcher bars 8X10 or 9X12
- 100% Cotton sheeting, organdy, muslin or similar lightweight woven cotton fabric
- soda ash fixative
- 2H pencils
- Staples and Staple gun
- Beeswax/Paraffin mix (sold as Batik wax or 50/50 mix)
- Small crock pots for melting wax (do not use for cooking)
- Old bristle brushes for waxing
- Tjantings (wax tool) size small and medium
- Cold water dye in various colors (Procion)
- white plastic watercolor palettes
- Watercolor brushes for dyeing
- Old steam iron
- Newspapers and clean newsprint (18X24)
Teacher Materials:
Resources:
- Work in various stages of completion to demonstrate process
- Student exemplars
- Books showing various Batik artists (BATIK for Artists and Quilters by Eloise Piper)
- www.batikguild.org.uk
Preparation:
- Wash fabric to remove sizing then soak in soda ash solution over nite.
- Pre-cut dry fabric 2 inches larger than stretchers
- Make sure wax is melted prior to each class session (requires up to 2hrs to melt, using a security timer that plugs into the outlet is recommended!)
- Pre-mix dyes in plastic bottles (I recycle dish detergent bottles with squeeze tops)
Introduction:
Batik is a process of creating two-dimensional designs on fabric. The process is at least two thousand years old - evidence of this process has been found throughout the Middle and Far East as well as parts of Africa. The Batik designs created on the island of Java in Indonesia are the most well-known today. The designs reflect the culture, religion and natural surroundings of the Javanese.
The process involves waxing areas of fabric so that the fibers cannot absorb dye. Areas of fabric that are waxed first remain white (or what ever color the fabric is before starting the process); areas waxed after dyeing remain the color of the dye. This process lends itself to images that are exotic in nature and have clear contour lines (or can be simplified through drawing contour lines - (show some images of stained glass and some contour drawings that would work well) Tropical fish, reptiles, and birds are good choices. Stained glass designs work well since the leaded joints become a contour. Ceremonial masks, Mardi Gras figures, Chines New Year images, kites, hot air balloons, and sunsets, are all possibilities. Expressionist and Post-impressionist paint styles also work well. The work of artists like Gaugin, Klee, Klimt, and O'Keefe can all provide inspiration! Tattoo art, known as "flash", also works well. Flash art can be found on many internet sites as well as in body art magazines. (Remember we should not copy others work directly even if it's a different medium from that which we are working in -- we can use a work as inspiration and work from it without copying. Students should be made aware of plagiarism and copyright infringement policies within the school.)
From whatever source you take your image, keep the following things in mind: The image will be 8X10 or 9X12 and should not include areas of color smaller than the tip of a pencil eraser (its nearly impossible to wax around such a small area without filling it in!) The image must have all the elements of good composition - it should be balanced in terms of space, shape, color, and value. It can be symmetrical or asymmetrical with repeating patterns - as long as it is visually dynamic and well planned!
Schedule:
| Day 1: |
Intro, and wax demo. Design images. |
| Day 2: |
Approval of images, transfer image to fabric, stretch fabric |
| Day 3: |
Second wax demo, Begin waxing |
| Day 4: |
Dye demo, Wax and dye |
| Day 5-12: |
Finishing demo, Studio time, closure upon completion |
Process:
Day 1:
- After the intro have students watch while you do a short waxing demo. This helps them comprehend why they need clear contour lines and must avoid small areas. Have a student volunteer try! Next, have students look for images on the internet or in magazines or resource books. Have them draw thumbnail sketches of images. Discuss the following issues with each student: Contour lines around each color, where colors will be placed, color choices, size of areas (too big will look simplistic, extremely small areas will be difficult to wax without filling in accidentally.)
Day 2:
- Upon approval, have student draw final image to the full size (12X12 or 12X18). The students can draw directly onto the fabric if their drawing skills are sufficient or onto white paper otherwise. The fabric can then be place over the drawing and the drawing can be traced onto the fabric.
- Have students stretch the fabric onto the assembled stretcher bars.
Day 3:
- Waxing demo: Draw a picture of a tjanting to show how the well holds wax and how the slant of the tip prevents wax from dripping during transport from the wax pot to the work. (Stretch a large 12x18 piece of fabric for students to practice on.)
- Cover work surface with newspaper. Place stretched fabric on the newspaper close to the wax pot. Holding the tjanting in one hand dip into the melted wax (initially the tjanting must be in the wax for 30 seconds to melt any solified wax and to heat the well up). Hold the tjanting tilted up to prevent drips (hold over a paper towel in the other hand if drips are a problem!). Place the tjanting's tip on a drawn contour line - without hesitating draw the line until the well runs dry or the wax comes out translucent instead of transparent (the wax is then too cool to penetrate the fibers).
- MAKE SURE THAT THE WAX IS PENETRATING THE FIBER - the cloth will look darker and the wax will come through the other side. If it is not penetrating, the dye will bleed through the contour line into other sections! Remove wax that has not penetrated and re-wax those areas. Remove by picking off with fingernail. Or draw another line of wax along side the line that did not penetrate.
- Return the tjanting to the pot and refill the well. Repeat the process until all the contour lines are drawn in.
- If any larger areas are to remain white, fill in using an old bristle brush dipped in wax.
Day 4: Dye Demo
- Using an eyedropper, place your first color in the well of a watercolor palette. Using a watercolor brush begin filling in the spaces intended to be that color. Work from the interior of the space out to the edges - this way if a wax contour is not fully sealed the dye will bleed through slowly instead of soaking completely into the next space. If you discover a problem, stop that section and continue with another. Once the fabric dries you can use more wax to seal the leak.
- Once you have filled in all areas for one color you must allow the fabric to dry.
- You can do additional colors if they don't touch areas just done (too much wet dye can cause runs and leaks that will bleed colors into each other.
- Once the dye is dry, wax in those areas to seal. The entire design will eventually be covered with wax -- this keeps all the fabric feeling the same after it is ironed out.
THINGS TO THINK ABOUT:
- Colors dry lighter
- Multiple coats of dye will produce more vibrant or darker colors
- Colors can be mixed on the fabric for interesting blending but the results are unpredictable - test on scrap fabric for color and technique. Wet on wet will fully blend, wet onto dry will blend less and will leave a water-line or stain at the intersection.
Day 5 or 6:
- Ironing demo: Carefully remove batik from the stretcher bars. Place several layers of newspaper on the ironing surface. Place fabric on top of newspaper and cover with several additional layers of newspaper. With an iron set on high, iron over the entire surface until the wax melts through the paper. Change paper as it becomes saturated with melted wax.
- Continue this process until the newsprint picks up no more wax. (If the newspaper ink seems to be transferring, use un-printed newsprint instead)
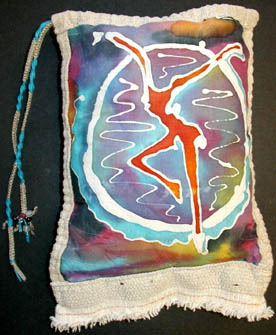
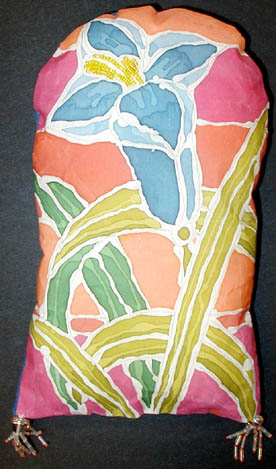
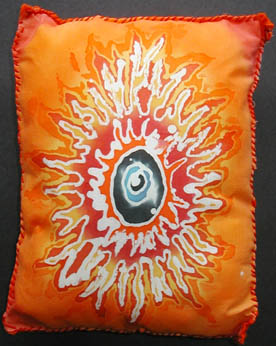
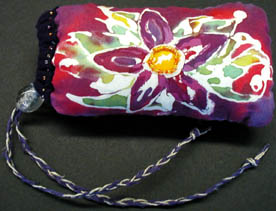
- Crop work down to the desired dimensions after ironing. Work can be mounted on matboard using acid-free mounting tape. Or the finished fabric can be made into pillows, sunglass cases or cell-phone pouches, or potpourri sachets. (see examples)
Closure and Grading Criteria: (See attached Rubric) An essay regarding the choice or imagery and the use of color to support the chosen theme is a standard part of the grading and is used as a starting point for a critique.
Work by Milford High School Students:
Antonio
Casasanta
Katie
Julie & James
Rubric in print-ready Adobe Acrobat pdf format
Browse the latest posts in the Mentor Center:
- Welcome to the AI in Education Chatboard!, 7/26/26, by Bob R/CA.
- Originalityreport Plagiarism Checker, 7/24/26, by pattyblack.
- Which Reddit communities talk about EssayBot?, 7/23/26, by Harri Evans.
- Teacher confused, 7/23/26, by keane.
- Calling UK educators: Oxford University survey, 7/22/26, by Renyu.
- Elementary Teachers voices for study on AI in the classroom., 7/20/26, by Marni.
- Ways to teach letter recognition in kindergarten., 7/20/26, by jimme.
- Teacher Wellbeing survey!, 7/19/26, by Moksha Bhangeia.
- Educator's Wellness Symposium (NC.), 7/18/26, by S&P EDUCONSULT.
- Educator's Wellness Symposium (NC.), 7/18/26, by S&P EDUCONSULT.
- Re: ABC Preschool & Kindergarten Center, 7/16/26, by jimme.
- How Do You Keep Young Learners Engaged During Literacy , 7/15/26, by jimme.
- Re: Part-time Opportunity for Educators , 7/15/26, by uffignore.
- Stock Market Learning Tools, 7/13/26, by learner4729.
- UK primary school teachers wanted for colour blindness study, 7/10/26, by ruby.
- Primary school teachers wanted for University of Sussex colo, 7/10/26, by ruby.
- Primary school teachers wanted for colour blindness study!, 7/10/26, by ruby.
- Part-time Opportunity for Educators , 7/06/26, by Ms. Shaina M..
- Part-time Opportunity for Educators , 7/03/26, by Ms. Shaina M..
- Part- Time Opportunity for Educators, 7/03/26, by Ms. Shaina M..
- 5 Effective Revision Tips for IB Students, 6/26/26, by baccalaureateclass.
- Master Java Full Stack Development: Course Details, Skills, 6/24/26, by Unique System Skills is a global IT training, consulting, and talent solutions company founded in 2008..
- Master Java Full Stack Development: Course Details, Skills, 6/24/26, by Unique System Skills is a global IT training, consulting, and talent solutions company founded in 2008..
- Master Java Full Stack Development: Course Details, Skills, 6/24/26, by Unique System Skills is a global IT training, consulting, and talent solutions company founded in 2008..
- Master Java Full Stack Development: Course Details, Skills, 6/24/26, by Unique System Skills is a global IT training, consulting, and talent solutions company founded in 2008..
- English 6-12 prompt, 6/22/26, by Sciencegeek.
- Free Coloring Pages Your Students Will Love , 6/20/26, by baptiste.
- ABC Preschool & Kindergarten Center, 6/19/26, by ABC Preschool & Kindergarten Center.
- Looking for Teacher Feedback on WheelQuiz, 6/16/26, by steverlast.
- Tools & Resources for TPT Sellers, 6/13/26, by Spylore.
- Tools & Resources for TPT Sellers, 6/13/26, by Spylore.
- Tools & Resources for TPT Sellers, 6/13/26, by Spylore.
- Teacher research (neurodiversity and inclusivity) , 6/08/26, by Laurie.
- TNet Redux, 6/06/26, by Bob R/CA.
- History App Feedback Form, 5/25/26, by Eshan Kulkarni.
|